The new wave of github apps
Github apps on the rise
Github apps on the rise
Now with a few lines of code we can create a flask application to install our new Github Application. (Yes, this is all the code you need)
# app.py

from flask import Flask, request, jsonify

app = Flask(__name__)

GITHUB_INSTALL_URL = "https://github.com/apps/<Github-App-Name>/installations/new"

@app.route('/')
def index():
    return f"<h1>Github Apps with Flask</h1></br> <a href='{GITHUB_INSTALL_URL}'>Install app</a>"

if __name__ == "__main__":
    app.run()

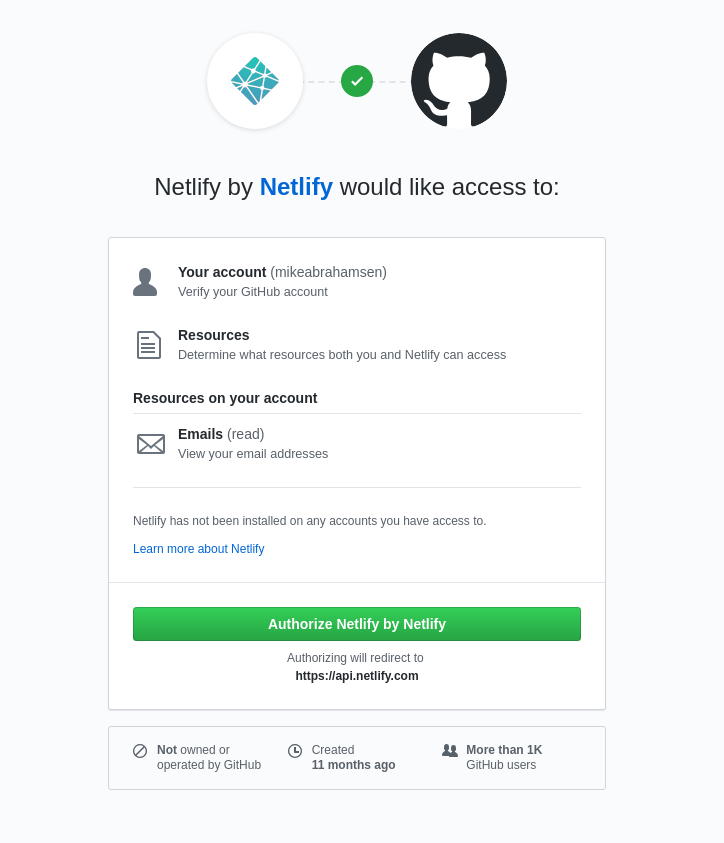
Using a Github app is the preferred way integrate with Github. By creating a Github app you can give your users more granular control of what you have access to. By transitioning Conveyor.dev to use a Github app the level of permissions that must be granted are much lower. For instance, when using an Oauth App with Github if you wanted to be able to read the contents of a repository you would need to ask for Read/Write permissions to every public and private repo for that user. With a Github App you can get Read-Only permission to select repositories.
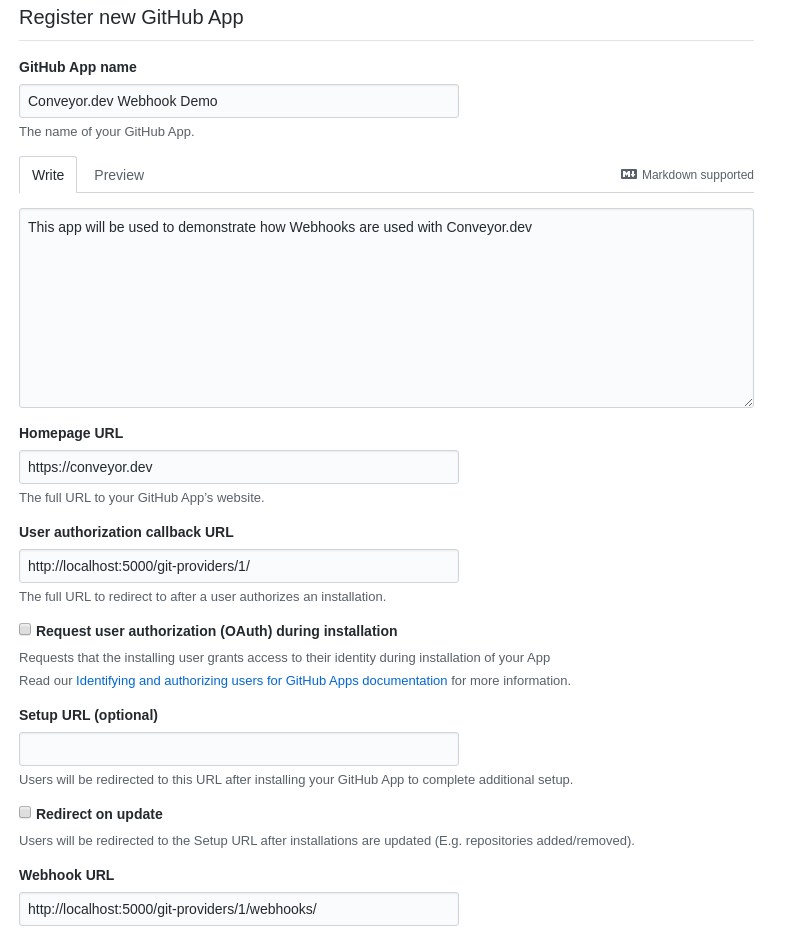
To get started head over to the Github Apps page and click the New Github App button.
To register a Github app fill out a few details:
Now start your flask server with the flask run command and navigate to
http://localhost:5000 and click on the Install app link to install the
Github application to your account

With that you now have your Github App installed on your account with access to the repo(s) that you selected.
Receiving webhook events and authenticating will be covered in the future.
The simple form of this macro looks like this:
# app/templates/macros.html

{% macro build_site_navigation(pages, selected) %}
<div class="w-1/4 mr-8">
    <ul>
        {% for page in pages %}
        <a href="{{page.url}}">
            <li>{{page.name}}</li>
        </a>
        {% endfor %}
    </ul>
</div>
{% endmacro %}
To use this macro in our template:
{% import "macros.html" as macros %} at the top of the template file{{macros.build_site_navigation(pages=pages, selected="Site Details")}}To populate the links in the sidebar I created a function generate_page_list
and then pass pages into the template
# app/routes.py

def generate_page_list(server_id, site_id):
    pages = [
        {"name": "Site Details", "url": url_for(
            "sites.show", server_id=server_id,
            site_id=site_id)
         },
        {"name": "Environment", "url": url_for(
            "sites.environment_page", server_id=server_id, site_id=site_id)
         },
        {"name": "SSL", "url": url_for(
            "sites.ssl_page", server_id=server_id,
            site_id=site_id)
         },
        {"name": "NGINX Config", "url": url_for(
            "sites.nginx_config_page", server_id=server_id,
            site_id=site_id)
         },
        {"name": "Workers", "url": url_for(
            "sites.workers_page", server_id=server_id,
            site_id=site_id)
         }
    ]
    return pages
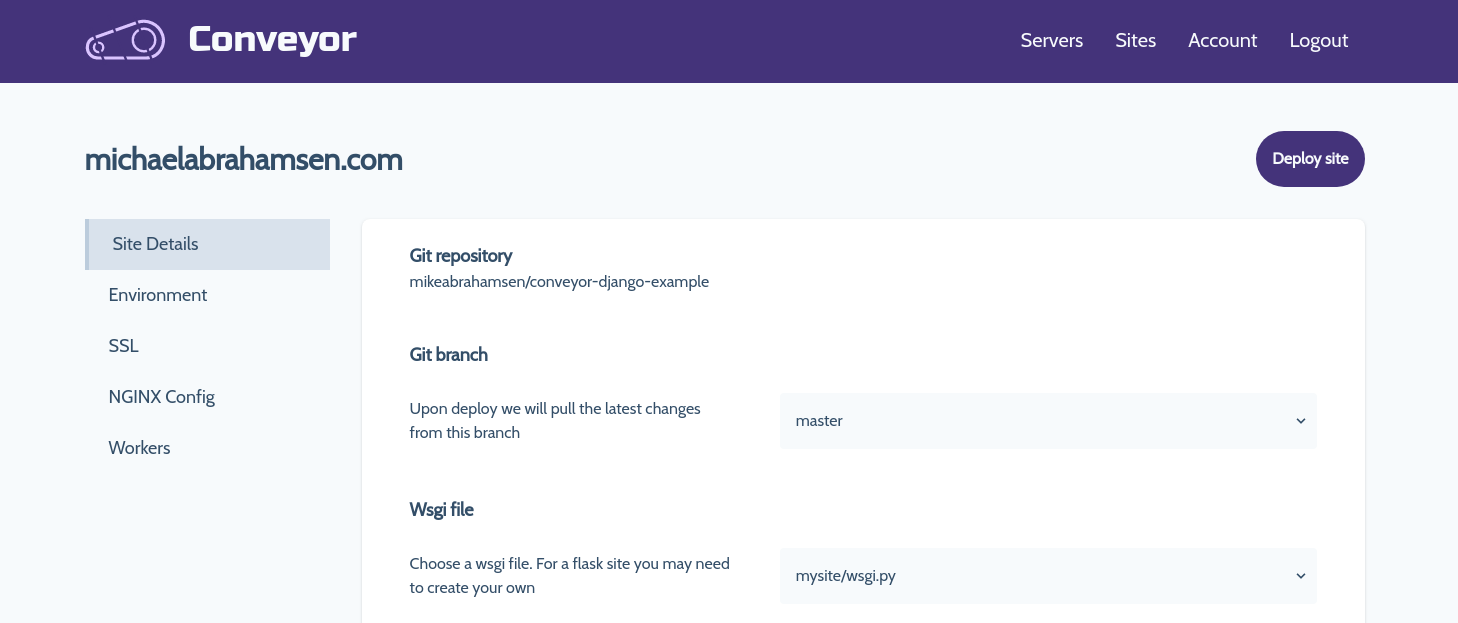
So the sidebar is now functioning but it needs some styles. Let's improve the macro a little bit to include styling with tailwindcss
# app/templates/macros.html

{% macro build_site_navigation(pages, selected) %}
<div class="w-1/4 mr-8">
    <ul>
        {% for page in pages %}
        <a href="{{page.url}}">
            <li class="text-lg pl-6 py-3 {% if selected == page.name %}border-l-4 bg-gray-200{% endif %}">{{page.name}}</li>
        </a>
        {% endfor %}
    </ul>
</div>
{% endmacro %}
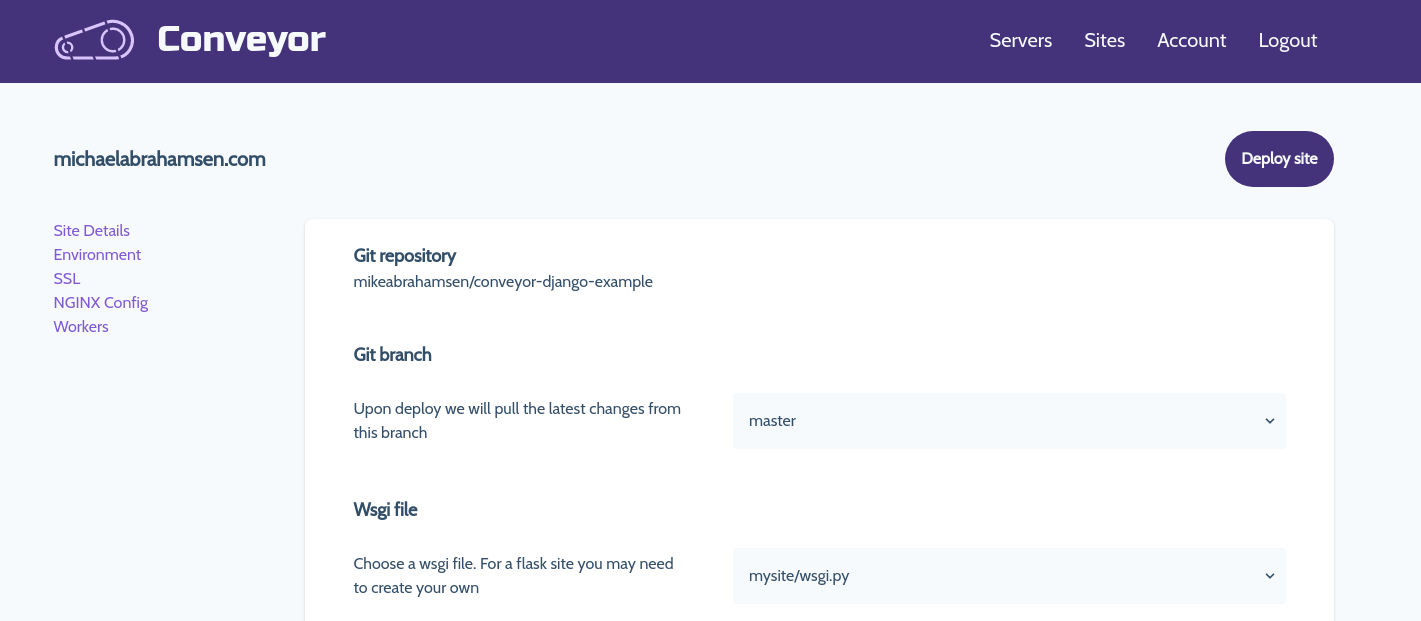
Now we are getting somewhere, here's an updated view
To make this fully functional some code changes must be made with the current routes. Previously the only route that was necessary to show this looked like this:
# app/routes.py

@app.route('servers/<int:server_id>/sites/<int:site_id>', methods=['GET'])
def show(server_id, site_id):
    ...
To support all of our new routes for the sidebar we are going to add a few more:
# app/routes.py

# this will now show the site details by default
@app.route('servers/<int:server_id>/sites/<int:site_id>', methods=['GET'])

# additional routes for new views
@app.route('servers/<int:server_id>/sites/<int:site_id>/environment', methods=['GET'])
@app.route('servers/<int:server_id>/sites/<int:site_id>/ssl', methods=['GET'])
@app.route('servers/<int:server_id>/sites/<int:site_id>/nginx', methods=['GET'])
@app.route('servers/<int:server_id>/sites/<int:site_id>/workers', methods=['GET'])
Everything was previosly held within a single template file, now we need to create a separate template file for each view
# the following files were created and their html was transfered from the
# original template file into their own

app/templates/site/details.html
app/templates/site/environment.html
app/templates/site/ssl.html
app/templates/site/nginx.html
app/templates/site/workers.html
Visit conveyor.dev to apply.
Install the requirements and run the pelican-quickstart command, following the prompts:
$ pip install -r requirements.txt
$ pelican-quickstart
$ mkdir pelican-netlify-cms && cd $_

# create and activate a virtual environment for your project, for example:
$ python -m venv venv
$ source venv/bin/activate
Create a requirements.txt file. This is important as Netlify will look for this file to determine dependencies. In the file:
pelican
markdown
Now assuming you have created an empty repo on Github, we will add this project to that repo.
$ git init
$ git add .
$ git commit -m 'initial commit'
$ git remote add origin Your_Own_Git_Repository_URL
For example, content/2019-04-20-sample.md
---
Title: My First Post
Date: 2019-04-20 05:30
Category: example
---

Post content
Push the post to Github
$ git add .
$ git push
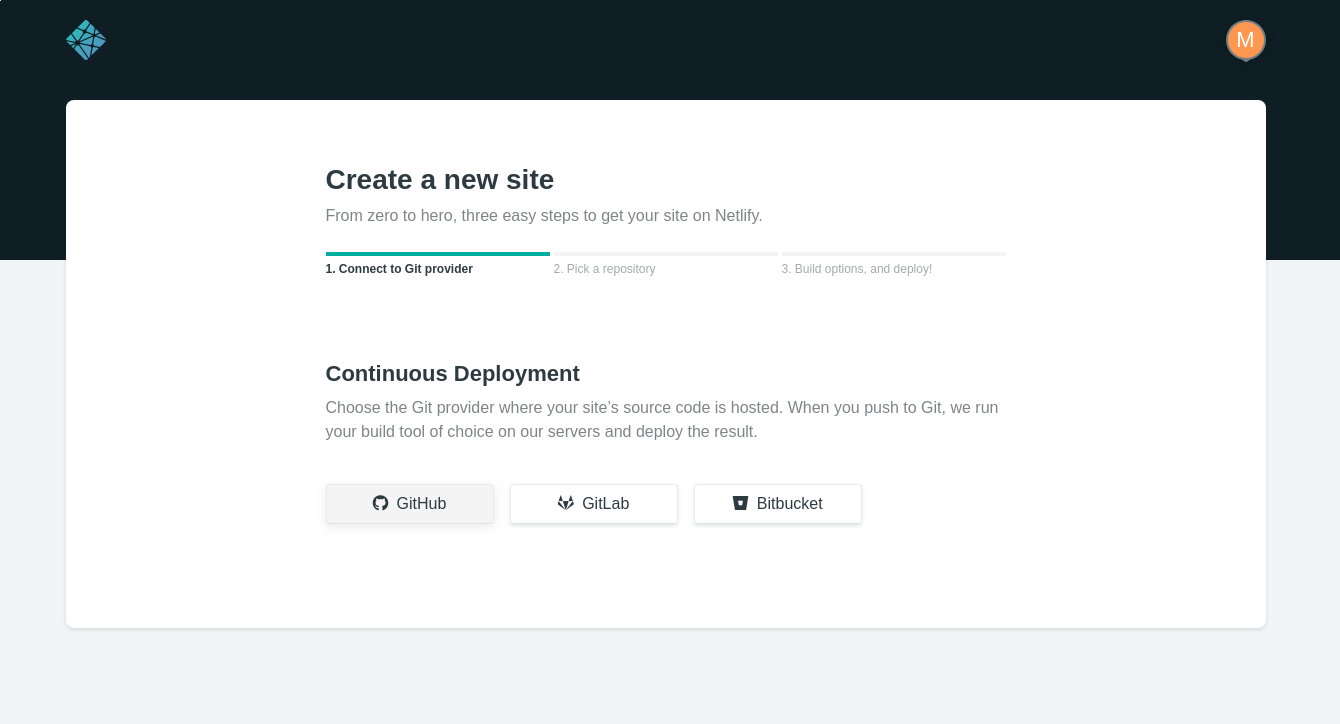
Connect to Github
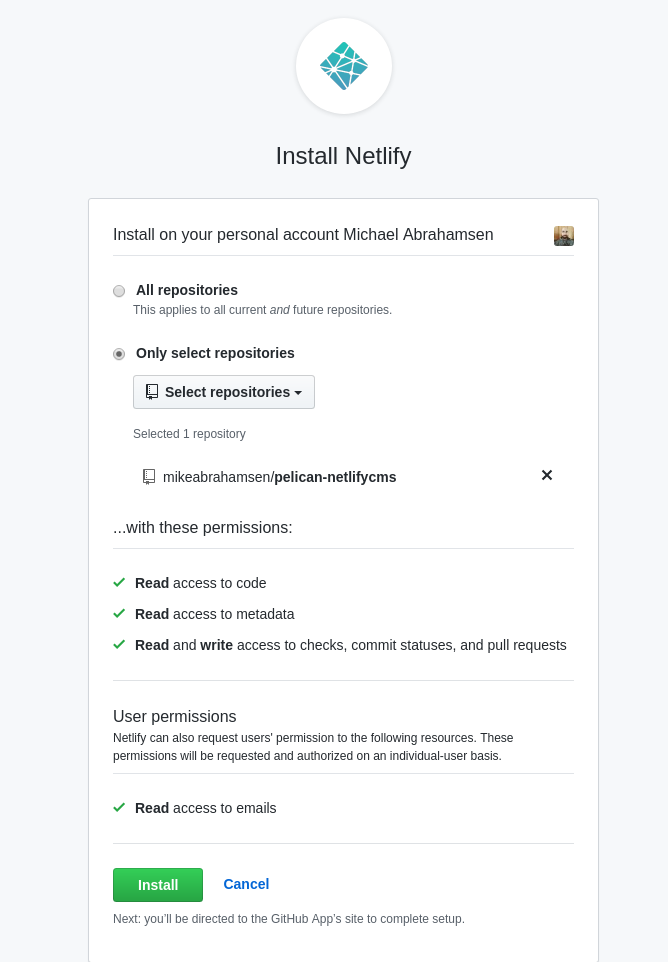
Choose the repositories that Netlify will have access to.
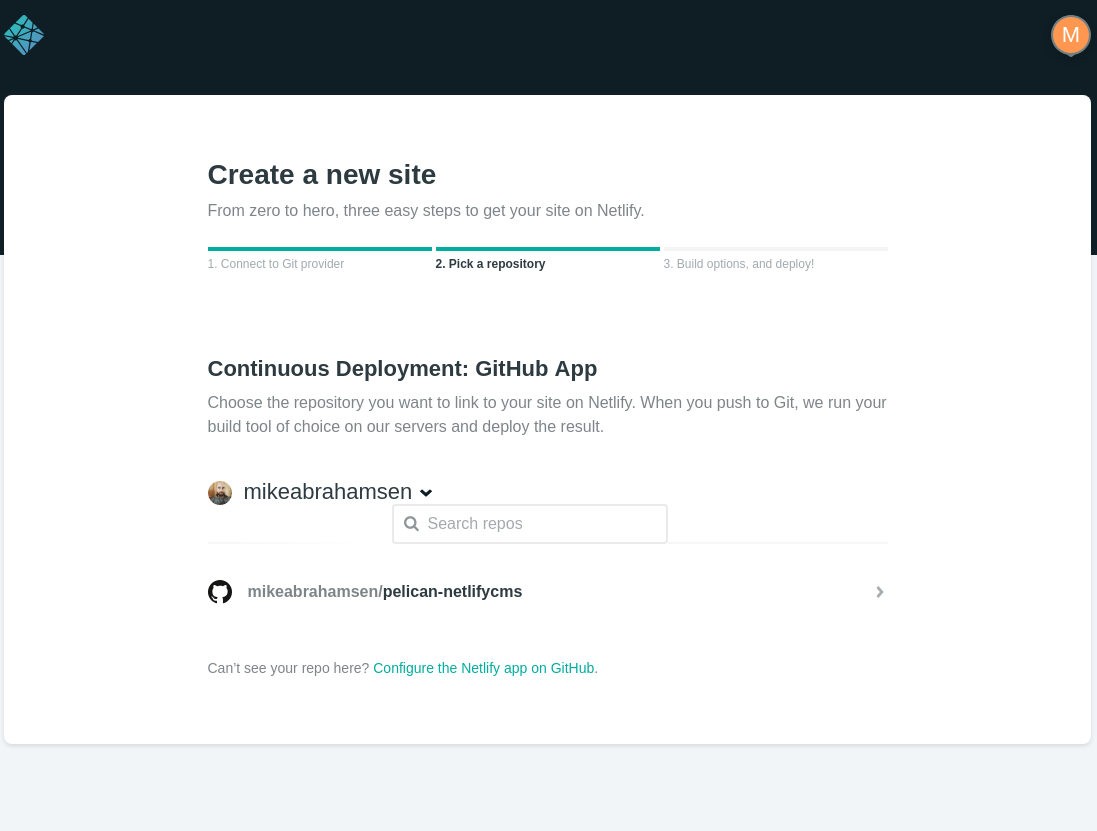
Now choose the repository to publish.
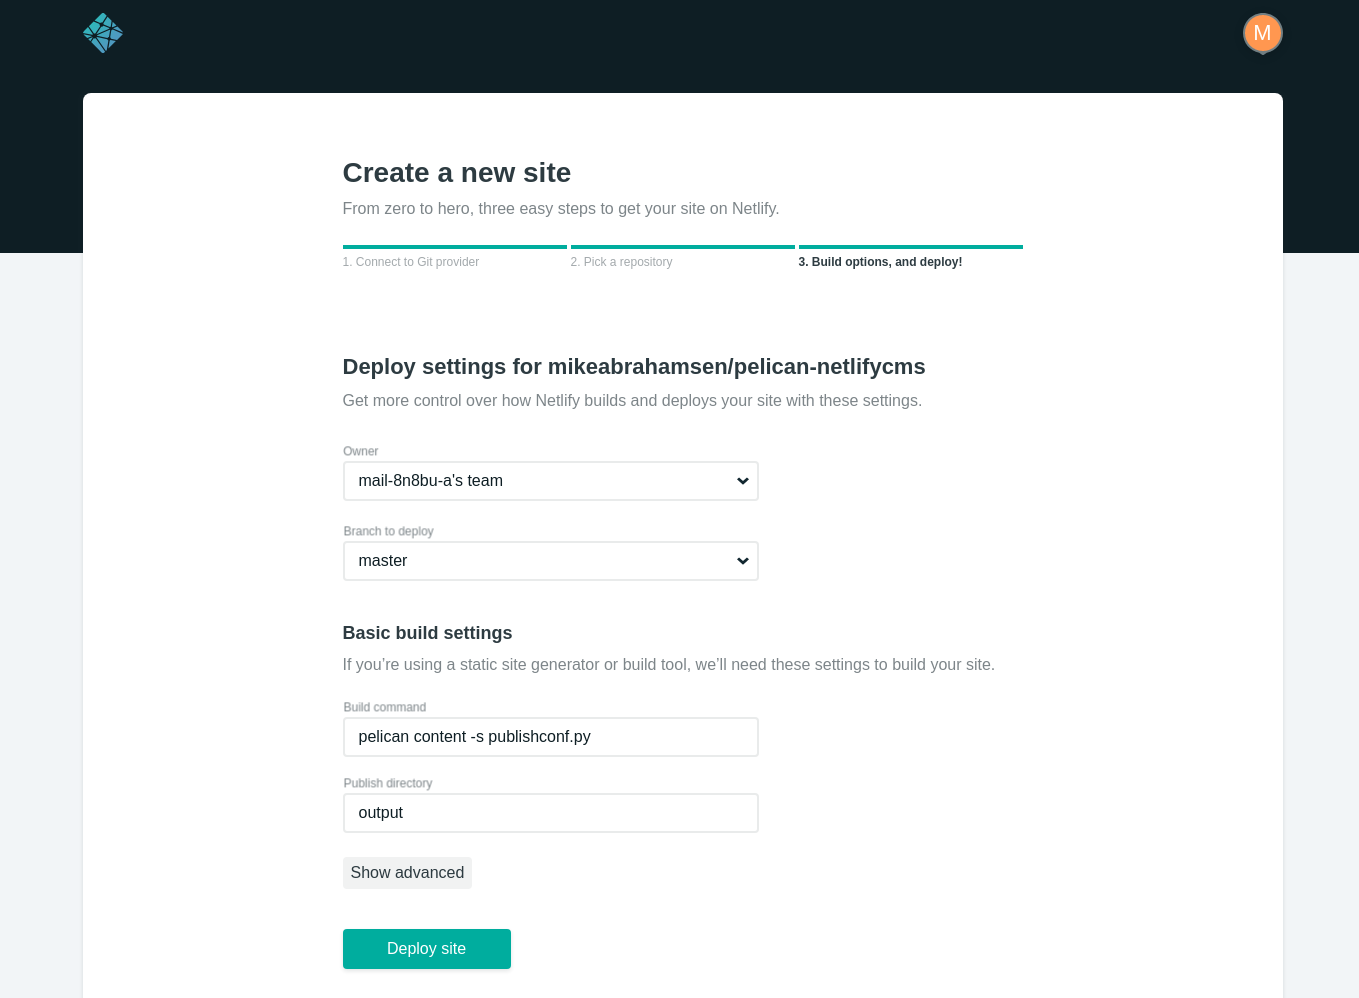
Add the build command and output folder.
pelican content -s publishconf.py
output
I was recently adding a slug field to a model in a Django application when I ran into this error when doing the South migration:
Error in migration: test_app:0002_auto__add_field_category_slug
DatabaseError: table "_south_new_test_app_category" already exists
When South makes changes to an existing table, it creates a new
table with a temporary name. The table is named
"_south_new_" + table_name. In this case, the new table name is _south_new_test_app_category.
Assuming the changes are successful, the old table is deleted and replaced with the new table.
However, the previous migration failed and the temporary table still existed.
To fix this, we need to drop the temporary table and redo the migration.
If you are not familiar with dropping a table, you can run the sqlclear
command to get a list of the drop table sql statements for an app. For
this test app it looks like this:
> python manage.py sqlclear test_app

BEGIN;
DROP TABLE "test_app_person";
DROP TABLE "test_app_category";
DROP TABLE "test_app_organization";
DROP TABLE "_south_new_test_app_category";

COMMIT;
Using the syntax you see from sqlclear you can run the dbshell command and drop temporary table.
> python manage.py dbshell

sqlite> DROP TABLE "_south_new_test_app_category";
Now as long as you fixed the issue with the migration that failed, you can run the migration again and it will work as planned.